 ‘The best camera you have is the one you have with you’. It’s a popular phrase in photography.
More often than not, the camera I have with me is the one in my iPhone 5s. I’ve been getting better (I claim!) at getting good (occasionally great) results out of it, and some friends asked me to write down some of the tips and tricks I’ve learned, that can help to get the best out of this tiny little camera.
The photos in the gallery below are intended to illustrate some of these tips and tricks in action. For these images, the photos have been taken with an iPhone 5s running IOS 7, with any image editing being done using iPhoto on Mac OS X.
The feature set announced for the Camera app in IOS 8 suggests that much (or all) of this image enhancement will be able to be done directly on the phone in that release.
Nonetheless, I find that access to a full size (laptop) screen is pretty essential in order to figure out whether the photo you’ve taken is really as good as you might hope for it to be.
In no particular order, here’s what I’ve learned so far.
Take lots of photos
It’s the obvious tip for any photographer, and it is very applicable with a camera that can often deliver an out of focus, blurred, or ‘late’ photograph if you do something with it in a hurry.
If you can possibly stand it, the next step is pull the photos into your Mac and delete the worst of them immediately…!Given that storage isn’t expensive (any more).. If in doubt, take another photo.
If you have found something amazing to photograph, that you really, really want to get right, take two shots ‘on principle’, just in case one of them gets botched in some manner that isn’t obvious at the time, on the iPhone screen.
Focus / light balance the image before taking the shot
Seems equally obvious, but its surprising how often people take a photo and it turns out fuzzy.
Get used to routinely touching the image on the screen to get the camera focussed on the part of the shot you are interested in, before taking the shot.
This also adjusts the light balance for the thing you’ve tapped on, and it can be quite instructive to try tapping on different parts of the image area to see the outcome before taking a shot.
HDR can help with high dynamic range scenes – at least some of the time
Where there are large differentials in lighting level in the photo you’re taking, HDR can help to capture all of it (providing the image doesn’t involve large amounts of movement).
Current versions of IOS 7 include an ‘Auto’ setting for HDR which I tend to leave on – on the basis that having yet one more shot to work with afterward can be a useful thing.
That said, there are times when the automatic HDR feature doesn’t ‘fire’ even when it would arguably provide a benefit.
If you don’t get enough dynamic range from a shot, be prepared to lock HDR mode on and try again if the automatic mode doesn’t fire by itself.
Consider AF/AE lock – especially for a sequence of action shots
If you want to take a sequence of shots, consider using the ‘AF/AE lock’ function. Tap and hold in your desired spot in the frame until the yellow box starts to animate, then release.
You will then see “AF/AE Lock” appear on the screen. The focus and exposure settings are now locked, and you can take multiple shots of the scene and/or ‘look around’ a bit without those settings changing.
This can be of particular use if the auto-focus is tending to lock onto the wrong thing.
Locking exposure can help with shots where you are interested in detail in the image that is being lost due to a bright object in the frame that is getting the attention of the camera but thatisn’t the thing you really want to photograph.
A shot where the sun is present in the image (but where it is not the sun you are trying to photograph) is the classic example.
Lots of light is your friend
Like most digital cameras, this camera rewards high light levels with (sometimes shockingly) clear photographs.
Accordingly, if there is light available, and providing you’re also holding the camera still, you can take surprisingly great photos.
That said, low light levels can sometimes yield surprisingly good results too – all the way through to night shots.
The key in low light situations is to do everything you can to hold the camera still – preferably brace it on something. Also ensure you keep remembering to tap the image to get the focus and light balance right before taking the shot.
Burst mode can be great for action shots
Burst mode is a feature many people don’t know about. Its actually quite easy to drive, and yet when people stumble upon it (often by accident) they don’t necessarily know what to do with it.
The use of Burst mode avoids the frustration of watching a moving opportunity approaching you – and trying to hit the shutter at ‘the right time’ – and failing to do so.For moving subjects, if you think there will be a challenge (even in the slightest challenge) with taking the shot at ‘just the right time’, then burst mode can be a silver bullet.
First, its worth making sure the shot focus and exposure suits you – by tapping the image and/or by using AF/AE lock to hold the settings constant.Now, just press and hold the shutter button down. The camera will start taking 10 shots a second (on current hardware – older iPhone hardware can’t run as fast as this).
A counter on-screen clocks up the image count as you go.
Don’t be afraid to run up a decent number of shots (into the hundreds) because managing them is easy… read on.
These shots get stored as a ‘burst’ (cluster) of photos and can be dealt with in an integrated manner in the Camera/Photo app in the phone.
Once taken, you can review the shots (I suggest doing it straight away).
Select the burst in the camera roll and tap on ‘Favourites’ at the bottom of the screen.
Now, review the shots you’ve taken, and select one or more that look the nicest. You can zoom in to the shot with the usual pinch-to-zoom gesture if you need to examine it more closely.
Select each one that you like, and then hit ‘Done’. You can elect to keep the ones you marked as favourites (only) or to keep them all. I suggest that you are brutal here – select just the ones you elected as favourites, don’t keep the rest.
‘Panorama Lite’: Using Panorama Mode to simulate a wider angle lens
If you are taking an image in the normal Photo mode and you just can’t quite fit everything in (and if you can’t step back to do it), a great trick to try is what I’ll call ‘Panorama Lite’.
Engage panorama mode and use it to fit your subject into the shot. Use as little panorama ‘sweep’ as you can manage, for maximum image quality (and minimum image distortion).
If the the total panorama angle is small, there is relatively little in the way of image distortion caused, and the result can nicely simulate having had a wider angle lens on the iPhone.
You can take a Panorama vertically
Did you know that you can get Panorama mode to work vertically?
Often I find that I’m too close to something tall, but I can’t step backward to get it in shot (and even if I can, the subject I’m trying to photograph starts to get lost in the larger frame).
You can engage panorama mode with the camera held in landscape orientation, start at the bottom, and sweep slowly upward to take the Panorama shot.
Like the previous tip, this essentially simulates a wider angled lens, and it (again) works the best if you minimise the extent of the panorama sweep as much as possible.
That said, sometimes quite a large vertical sweep can generate a shot at this still interesting, despite the panorama distortion.
Don’t use digital zoom
All you’re doing with the built in ‘digital zoom’ is discarding data that cannot be retrieved later. It is much better to simulate zoom later by cropping the native image in an image editor.
Doing it this way lets you experiment with different amounts of zoom (via the cropping function in iPhoto).
It also lets you use image cropping as a creative tool, to draw attention to the primary elements of the shot. Even a small amount of cropping of an otherwise good image can turn it into a great one, by accentuating the best elements of the image.
In addition, cropping allows different shaped rectangles to be applied, so you have a lot more creative control than is available by simply ‘zooming’ the image on the camera in the first place (which retains the standard camera aspect ratio).
Using the flash
The flash on the iPhone 5s sucks a lot less than the previous generations of iPhone. Those were so bad that I basically avoided bothering.
The iPhone flash also tends to flatten images out, so it is often better to find an external light source rather than using the flash, if that happens to be possible.
However, the twin LED’s on the iPhone 5s that allow for warm/cool colour balancing can help a lot with obtaining a good colour temperature and an acceptable level flash intensity.
But it's a tiny light source, and a source that can’t be moved relative to the camera lens, both of which make it a pretty restrictive tool.
All that said, sometimes it can render a great shot, when the subject is at an appropriate distance and when the ‘flattening’ of the image due to the light intensity doesn’t impact the result.
I’ve included one great example of the flash working well, under just those conditions, in the gallery below.
As with everything else about the use of a camera – experimentation is a great way to figure out, for yourself, what works and what doesn’t.
The flash is a strong case in point.Its worth playing with the flash in a darkened environment to get the hang of where it can work and where it just can’t – to avoid disappointment when you are in a hurry to get a great shot later.
When you do have to use flash, and if your subject can stand it, the advice to take multiple shots counts even more strongly here – because of the variability of results that is possible with the use of this flash.
Photo post-processing/enhancement
Many photographs can benefit greatly from colour re-balancing and some work on contrast levels after the fact.A good example of that is the shot of the Burj Khalifa in Dubai that is in the gallery below.
The ‘enhance’ button in the iPhoto edit function is always worth a shot, I find. Sometimes it really makes the shot ‘pop’. Sometimes it makes it worse. If you don’t like the result, just hit ‘undo’ and start twiddling manually instead.
ABOUT THE GALLERY

- Using Burst Mode

- Cropping the shot to simulate zoom

- Burj Khalifa on takeoff from Dubai

- Cropping the image for detail

- Colour enhancement of the Burj Khalifa

- A rainbow that doesn’t fit

- ‘Panorama Lite’ makes the rainbow fit in!

- Cropping the image to tidy it up

- A doorway under a tower
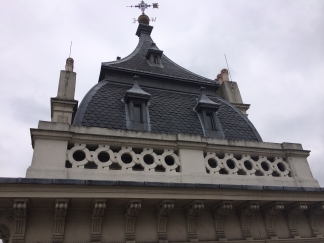
- A tower above a doorway

- Vertical Panorama mode to get it all in

- Vertical panorama of a Redwood

- This crowd is bigger than my lens

- A touch of panorama mode to fit them all in

- Some shots don’t have much warning

- Cropping to do the best with what you have

- Shots can be very clear in good light

- Aircraft at Pilatus Factory in Switzerland

- Cropping helps a lot

- Low light is challenging

- Night shots can work well

- Sometimes low light can be your friend

- Flash -can- be your friend
This blog is republished with permission from Simon Hackett. You can find the original blog post at http://simonhackett.com/2014/06/10/iphone-5s-photography-tips/.
Related News
- Fire flights over Adelaide Hills and KI create 3D maps of fire grounds for recovery and future safety planning Simon Hackett (left) with Jorg Hacker and an ARA plane"“In many cases, remote sensing data taken from fire-affected areas disappears into a black hole" Adelaide-based Airborne Res...
- Airborne Research Australia soars with the Hackett Foundation Simon Hackett (left) with Jorg HackerAn SA-based airborne research institute that tracks everything from dinosaur footprints to cattle flatulence has received a major research boos...
- VAF demos $90,000 Sony 4K laser projector in SA Sony VPL-VW5000ESAdelaide’s premier audio-visual specialist VAF Research will this week display Sony’s latest and greatest 4K high definition laser projector - worth $9...
- Hackett ticks the boxes for Charles Todd Medal Internode founder and NBNCo board director Simon Hackett this week collected the Charles Todd Medal for his outstanding contributions to the Australian telecommunications industry....


